
Ever thought that keeping your iPhone private online might be harder than it seems? With cyber threats around every corner, many people assume setting up a VPN is a complicated process. But in our experience, joining a secure network is both fast and easy. This guide walks you through two simple methods, using an app or doing it manually, in clear, step-by-step instructions that anyone can follow. We cover everything from changing your phone's settings to checking that your connection is safe. Enjoy a straightforward way to protect your data without the usual hassle!
Quick VPN Setup Cheat Sheet for iPhone
Need a VPN on your iPhone? Here’s a simple guide to get you connected fast.
- First, decide if you prefer to use an app or set it up manually.
- If you choose the app method, download your VPN app, follow the prompts to install the profile, and tap the connect button.
- For a manual setup, open Settings, tap General, then VPN, and finally Add VPN Configuration. Enter your server address, remote ID (for example, vpn.example.com), username, and password.
- Next, choose your protocol. For manual setups, select either IKEv2/IPSec or L2TP/IPSec. If you’re using an app, stick with its supported protocol.
- Turn on the VPN either through the Settings or directly in your chosen app.
- Finally, check for the VPN icon in your status bar or use an IP lookup tool to confirm that the VPN is active.
Manual iPhone VPN Configuration Without an App
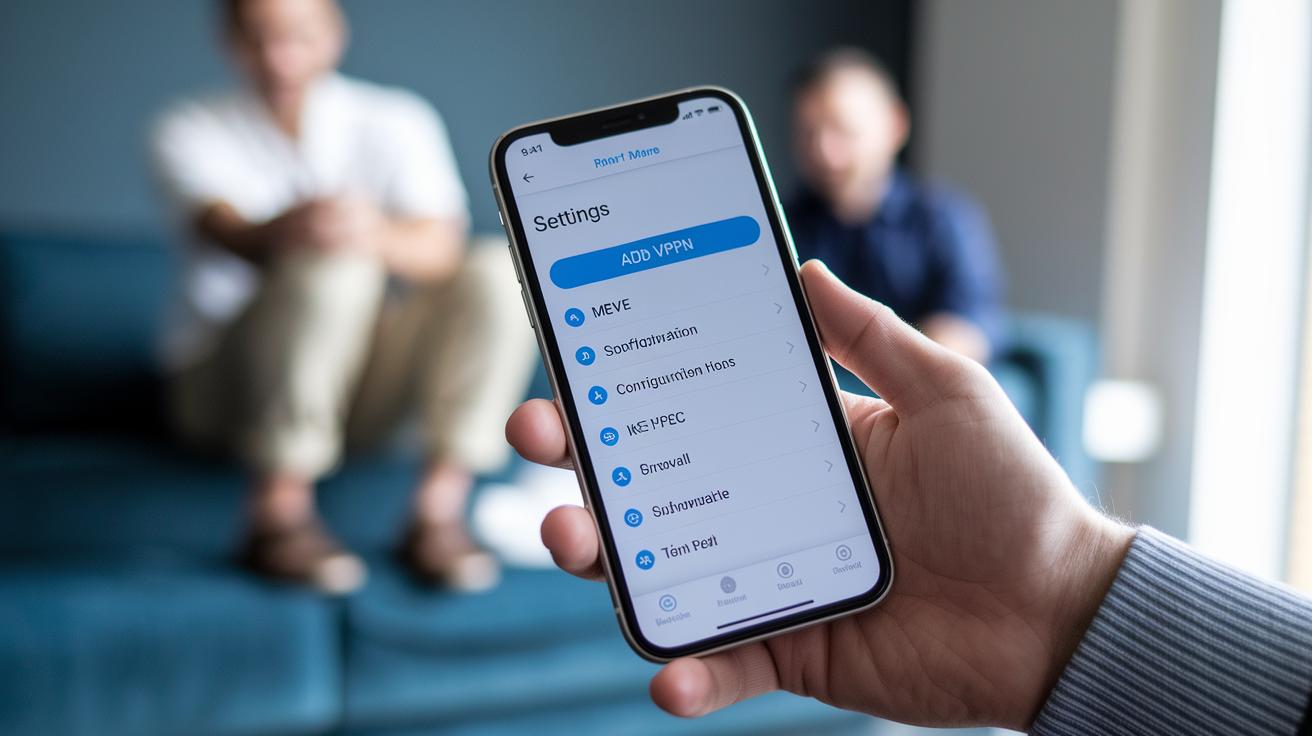
You can set up your VPN right from your iPhone without needing a third-party app. Just head to Settings, tap General, then VPN, and choose Add VPN Configuration. Enter your VPN server address, remote ID (for example, vpn.example.com), and your login details such as your username, password, or certificate.
For the best mix of speed and reliability, pick IKEv2/IPSec as your protocol. If you run into issues, you can opt for IPSec or L2TP/IPSec instead, though L2TP/IPSec can sometimes work better on certain networks. Remember, protocols like OpenVPN and WireGuard need extra apps.
Here's a quick setup guide:
- Open Settings and tap General.
- Scroll to VPN and select Add VPN Configuration.
- Choose a protocol: IKEv2/IPSec (ideal for most users), IPSec, or L2TP/IPSec.
- Fill in the VPN server address, remote ID (e.g., vpn.example.com), and your credentials.
- Save and toggle the connection switch.
Once connected, you’ll see a VPN icon in your status bar. You can also check your new IP using an online IP lookup tool by entering the VPN’s remote ID to confirm the connection.
Protocol Differences and Troubleshooting
With IKEv2/IPSec, you'll likely enjoy quick connections and steady performance. If you notice occasional drops, IPSec might work better, and L2TP/IPSec can be a reliable backup for compatibility challenges.
If you have trouble connecting:
- Double-check that all settings match what your VPN provider specifies.
- Verify your connection by using an online IP lookup tool, type in your VPN’s remote ID (like vpn.example.com) to see if your location updates.
- Ensure your network isn’t blocking the chosen protocol.
App-Based VPN Installation on iPhone
For step-by-step app installation details, please refer to our earlier guide. Here, we focus on advanced features and some quick troubleshooting tips.
Many VPN apps offer protocol choices like Lightway or WireGuard. For example, Lightway connects almost instantly, giving you both speed and strong encryption. Some apps come with a built-in kill switch that cuts your connection if the VPN fails, keeping your data private. You’ll also find auto-reconnect options that help maintain a steady connection even during network hiccups.
Paid VPN apps generally provide more robust features and greater flexibility. Free apps, on the other hand, might limit your options, reduce your bandwidth, or even log your usage.
If you experience any issues, try changing servers or simply restarting the app. Also, take a look at your iPhone’s VPN settings if advanced features aren’t activating properly.
| Feature | Paid VPN Apps | Free VPN Apps |
|---|---|---|
| Built-in Kill Switch | Yes | Rare |
| Auto-Reconnect | Yes | Limited |
| Protocol Options | Lightway, WireGuard | Fewer Choices |
Remember:
- Restart the app if your connection drops.
- Switch servers to boost performance.
- Check your VPN settings when advanced features aren’t engaging.
Configuring IKEv2 and L2TP/IPSec on iPhone

When setting up a manual VPN on your iPhone (see Manual iPhone VPN Configuration Without an App for more details), you can choose either IKEv2/IPSec or L2TP/IPSec. To start, go to Settings, then General, then VPN, and tap Add VPN Configuration. You'll need to enter the server address, Remote ID, and your authentication info for either option.
For IKEv2/IPSec, the connection quickly reconnects when you switch networks, which is great if you jump from Wi‑Fi to cellular. Just fill in the server address and Remote ID, like entering vpn.example.com as the server to enjoy smooth, reliable roaming.
For L2TP/IPSec, use the server address and Remote ID your provider gives you, and include a Local ID if required. For instance, type vpn.example.net as the server and add the correct remote ID. This option is best in older network environments, though it might be blocked on some networks.
| Protocol | Benefit | Consideration |
|---|---|---|
| IKEv2/IPSec | Fast reconnection and seamless roaming | Excellent for frequent network switching |
| L2TP/IPSec | Good legacy support and native availability | May get blocked on some networks |
Managing and Verifying Your iPhone VPN Connection
To set up your VPN, follow the instructions from the manual or app installation guide. If you’re setting it up manually, open Settings, tap VPN, and switch it on. If you prefer using an app, simply tap the connection controls on the app’s main screen. In either case, look for the VPN icon in your status bar to confirm that your connection is active.
Next, check your IP address to ensure it matches the VPN server’s details. Open your browser, visit a site that shows your IP, and compare it with the one provided by your VPN.
Checklist for a secure connection:
- Use Settings or your VPN app to toggle the connection.
- Look for the VPN icon in your status bar or the connected indicator in the app.
- Verify your public IP address matches the VPN server’s IP.
- Enable auto-reconnect in your VPN settings so the connection restores automatically if your network changes.
- If problems continue, restart the VPN app or your device.
VPN Security Best Practices for iPhone Users
When you’re using public Wi-Fi or switching networks, keep your VPN turned on. Modern VPN protocols like IKEv2 and WireGuard help you reconnect quickly and stay safe while your data is on the move.
Paid VPN services usually offer stricter privacy policies. They come with perks like dedicated servers and DNS leak protection, unlike free options that might log your activity or put limits on your bandwidth.
You can boost your security by adjusting your VPN’s settings. For example, pick the server nearest to you to lower lag. Turn on the kill switch to immediately protect your data if the VPN drops. If your service supports split tunneling, use it to send less important traffic outside the secure tunnel while keeping sensitive apps protected.
Remember to test your VPN settings now and then. Check that your public IP changes properly and your DNS queries remain secure. This simple routine keeps your VPN setup strong and your online activities private without slowing you down.
Troubleshooting Common iPhone VPN Issues
If your VPN isn’t connecting, it might be due to a few simple errors. Often, a typo in the server address, a remote ID that doesn’t match your provider’s info, wrong credentials, or an expired certificate can cause problems. The first step is to review every field in your VPN setup to make sure all details match what you were given.
Sometimes the solution is as easy as deleting your VPN profile and setting it up again. A quick restart of your iPhone can also clear up temporary glitches. Updating your iOS to the latest version may fix compatibility issues that block your VPN from working properly.
If you notice that the VPN toggle won’t switch on or off, head over to Settings > VPN & Device Management. Leftover or conflicting profiles there can interfere with how your VPN functions.
For VPN apps, try force-quitting and reopening the app first. If that doesn’t help, uninstalling and then reinstalling the app from the App Store can fix errors caused by corrupted app data.
- Check that every detail in your VPN configuration is correct
- Delete and re-add the VPN profile if needed
- Restart your iPhone and update to the latest iOS version
- Look under Settings > VPN & Device Management for active profiles
- Force-quit the VPN app, or reinstall it from the App Store
Selecting the Right VPN Service for Your iPhone
When picking a VPN for your iPhone, start by checking the provider's reputation and the number of servers they offer. A trusted service keeps your data safe while still giving you a fast connection. Free VPNs might look good at first, but they often slow you down, limit your data, show ads, or even keep logs of your activity. For example, compare a free option with just a few servers to a paid plan that gives you access to hundreds.
Take a close look at each service's privacy policy and test results. Find extra features that could be useful, such as support for multiple devices, a kill switch (which blocks internet access if the VPN stops unexpectedly), and round-the-clock customer help. It’s a smart move to try out a service using a trial period or a money-back guarantee so you can see if it really fits your needs before you commit long-term.
- Read reviews and check ratings
- Verify the number of available servers
- Examine the protocols and encryption methods used
- Take advantage of trial options to test the service
This way, you ensure you choose a VPN that works best for how you use your device.
Final Words
In the action, we've broken down a quick cheat sheet and step-by-step guide for setting up a VPN on your iPhone. The article covers manual configuration through settings, app-based installation, and even protocol choices like IKEv2 and L2TP/IPSec. You also found tips for managing connections, troubleshooting common errors, and selecting a VPN service that fits your needs. Follow these steps on how to setup a vpn for iphone and enjoy a safer, smoother online experience. Happy connecting!
FAQ
FAQs
How do I set up a free VPN on my iPhone?
Setting up a free VPN on your iPhone means using either a free app or the manual configuration through Settings. Go to Settings > General > VPN > Add VPN Configuration, then enter your server details and credentials.
How do I configure IKEv2 VPN on my iPhone for free?
Configuring IKEv2 VPN on your iPhone involves selecting the native IKEv2 protocol during manual setup. Enter the server address, remote ID, and login credentials to use this fast, stable protocol without an app.
How do I use a VPN on my iPhone without an app?
Using a VPN without an app on your iPhone is done through manual setup. Open Settings > General > VPN > Add VPN Configuration and input the required server and credential information for a secure connection.
Does my iPhone come with a built-in VPN?
Your iPhone has built-in VPN support, allowing you to manually set up protocols like IKEv2, IPSec, or L2TP directly through the settings without needing an additional app.
How do I activate the VPN on my iPhone?
Activating VPN on your iPhone is easy by flipping the VPN toggle in Settings or using your VPN app. Once enabled, a VPN icon appears in the status bar, indicating your connection is active.
What does adding a VPN configuration do on an iPhone?
Adding a VPN configuration on your iPhone creates a secure tunnel for your internet connection by encrypting your data. This setup routes your traffic through a remote server, enhancing your online privacy.