
Noticing strange colors or choppy visuals when you play? The problem might not be the game itself but your graphics card acting up. Many users miss out on quick fixes that can restore the GPU to its best. In this guide, we share simple tests and easy cleaning steps that you can follow at home. With just a few common tools and careful checks, you might save time and money by avoiding a new purchase. Keep reading to learn how to revive your graphics card and enjoy smoother gameplay.
Comprehensive Graphics Card Repair Tutorial: Step-by-Step GPU Fix Guide
If your graphics card isn’t performing as expected, start by checking a few key points. We run through simple tests to decide if the problem is software-based or needs a hardware fix. This quick review helps you tackle easy solutions before diving into more detailed repairs.
Begin by verifying cable connections so you don't get a black screen. Make sure all cables are secure, the power supply provides enough juice, the motherboard slot is working, and the monitor settings are set right.
Are you seeing weird visual glitches like colored squares or flickering lines during games? A stress test focusing on the VRAM and GPU core should help you spot these issues.
If your game performance drops, check your frames per second (FPS) and review your GPU driver. Confirming that your drivers are current can reveal if the card is underperforming.
When the graphics card overheats, look for dust buildup on the fans and heatsink. Test that every fan is working well and inspect the thermal paste and pads. Worn-out or misplaced thermal paste might be the culprit.
These tests form a step-by-step repair plan that shows exactly where the problem lies. Once you know what’s wrong, you can choose between a simple software fix, like reinstalling drivers, or a hands-on job, such as cleaning, reseating the card, or replacing thermal pads. This methodical approach helps you move forward with confidence and get your graphics card running smoothly again.
DIY Repairing Graphics Cards: Tools, Equipment, and Safety Measures
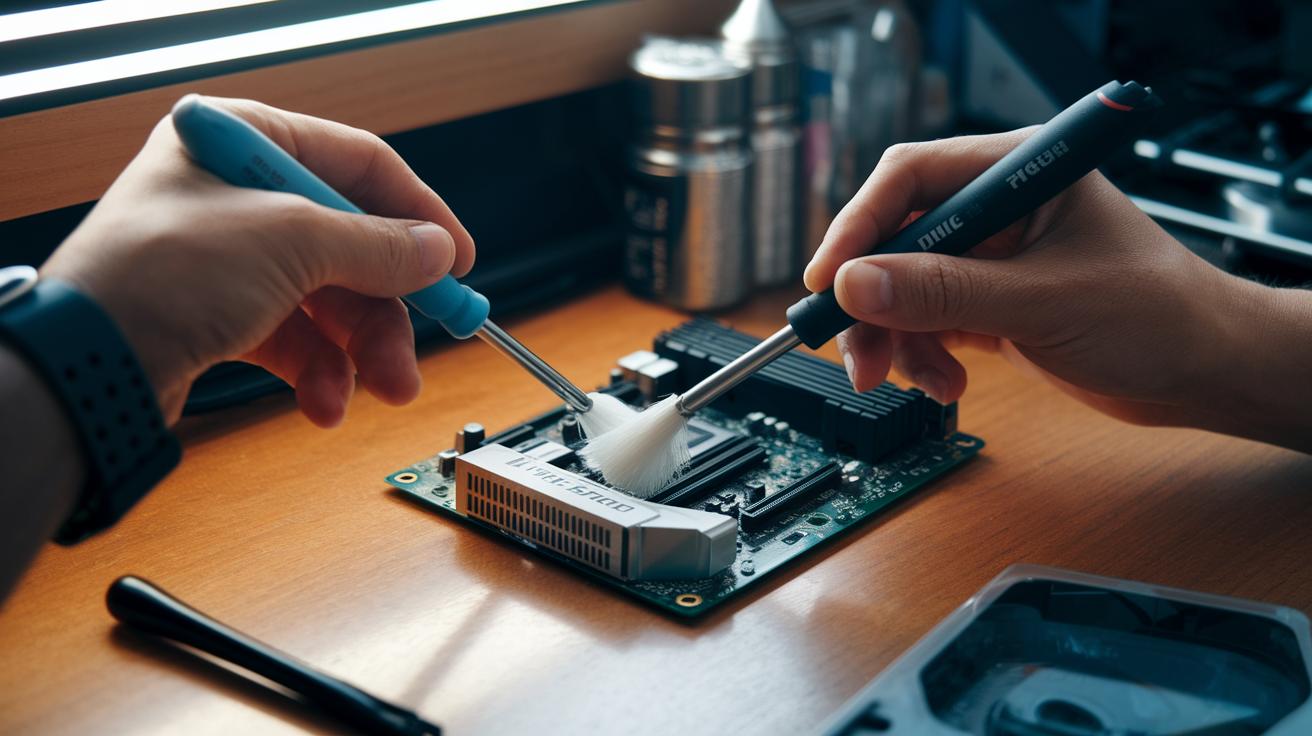
If you're planning to repair your graphics card on your own, having the right tools and safety practices makes all the difference. Start with simple hobby tools. Use a Phillips screwdriver to remove screws without harming any parts and a soft brush with isopropyl alcohol to clear away dust and residue. An anti-static wrist strap is a must to safely discharge static electricity and protect delicate circuits.
For good thermal performance, quality thermal paste is vital as it helps restore proper heat transfer, while replacement thermal pads or spacers ensure the heatsink fits snugly against the GPU. If your repair work is more advanced, consider investing in a hot-air rework station and a precision soldering iron. These tools make it easier to apply heat evenly and perform careful soldering for tasks like reflowing or swapping components.
Always remember to put safety first. Work in a well-ventilated area, especially when using isopropyl alcohol or hot-air tools, and keep the hot air directed away from other components to prevent any accidental damage. Regularly use your wrist strap to discharge static build-up. Following these guidelines will help you complete your repair safely and efficiently.
Advanced GPU Repair Techniques for Graphics Card Hardware Restoration
If your GPU shows issues like vertical stripes or a black screen, you might need to try some hands-on fixes. First, inspect the card for any visible signs of damage. Sometimes a missing heatsink distancer pad can cause vertical stripes. Replacing this simple part can improve cooling and get your GPU working properly again.
Another approach is a reflow procedure. With this method, you use a controlled hot-air tool to evenly heat the chip and fix tiny solder cracks. Start by carefully removing the heatsink, then use a precision hot-air rework station to move heat across the chip’s surface. Watch the temperature closely and apply heat gradually. For example, heating the BGA core for 2-3 minutes at about 350 °C lets the solder soften enough to fix minor cracks.
If the GPU core is damaged more severely, you might need to perform reballing. This repair uses a special BGA rework station and pre-cut solder balls to rebuild the chip’s connections. First, remove the old, damaged solder completely. Next, place the new solder balls onto the chip’s pads and reheat the assembly with your hot-air tool. This process helps restore proper electrical connections when a simple reflow isn’t enough.
Finally, check for capacitor issues on the adapter board. Look for any capacitors that are bulging or leaking. If you find any, use your hot-air tool to remove the bad ones and replace them with low-ESR capacitors that match the required specs. This swap can fix power delivery problems and help prevent further damage.
Done carefully, these hardware techniques can revive a struggling GPU and extend its life.
Graphics Card Testing and Validation After Repair

Once you finish your repair, it's time to check if your graphics card is working properly. Start by running a 30-minute stress test using FurMark or Unigine Heaven. This test pushes your card to the limit so you can spot any sudden temperature surges or screen glitches that might reveal hidden issues. Always run the test in a controlled environment so you get clear and repeatable results.
- Run a stress test with FurMark or Unigine Heaven for 30 minutes.
- Keep a close eye on your fan speed, GPU and RAM temperatures, and check that the clock remains steady using a tool like MSI Afterburner.
- Make sure you don't see any Video_TDR_FAILURE blue screens during Windows 10 standby or boot cycles.
- Verify that picture output remains clear across different resolutions and refresh rates.
This simple checklist helps confirm that your repair brought the graphics card back to proper working order. Watching for sudden temperature jumps or discoloration can indicate if there are still overheating issues. Keeping an eye on fan performance and clock speeds confirms that the internal settings have stabilized. By taking these tests seriously, you can be confident that both hardware and software problems have been resolved.
Graphics Card Repair Cost Guide: DIY versus Professional Services
If your graphics card is acting up, you can often start with simple fixes at home. In our tests, cleaning dust from fans, reinstalling drivers, or swapping out thermal pads usually costs less than $10. These basic repairs work great when the issue is minor, like a little overheating or some lag in performance, so you can avoid expensive fixes.
- DIY fixes (cleaning, driver updates, thermal pad swaps): under $10
- Professional reflow or component replacement: about $100 to $200
- GPU reballing services: roughly $150 to $250 per chip
- More complex repairs, such as using spare modules or updating firmware, can bring the cost up even more
Remember, a DIY fix might save you money but it also comes with a risk of doing more harm than good if you're not comfortable with the process. Professional repairs cost more upfront, but they can extend the life of your graphics card and reduce downtime. Your decision should depend on how serious the problem is and your confidence with home repairs.
Final Words
In the action, we tackled everything from basic troubleshooting to advanced fixes, guiding you through diagnosing issues, step-by-step repairs, and thorough testing. We reviewed targeted checks for black screens, artifacts, and overheating. We also covered proper safety and tool setups for DIY repairs and compared costs to help you decide between DIY and professional services.
This hands-on guide gives you the confidence needed when repairing graphics cards, setting you on the right path for a successful fix. Enjoy the process and repair with confidence.
FAQ
Q: Repairing graphics cards reddit
A: The topic of repairing graphics cards on Reddit refers to community-driven discussions where users share personal experiences, troubleshooting tips, and DIY repair advice for fixing GPU issues.
Q: Graphics card repair cost
A: The graphics card repair cost varies by issue and method. DIY fixes are usually low-cost, while professional repairs often range between $100 and $200 or more depending on the severity.
Q: GPU repair near me
A: The search for GPU repair near me means finding local repair services. Use search engines or check local electronics repair shops to locate professionals specializing in GPU fixes.
Q: GPU repair software
A: The GPU repair software typically includes diagnostic tools that check temperatures, clock speeds, and visual artifacts. Tools like MSI Afterburner and FurMark help pinpoint potential GPU issues.
Q: GPU repair course
A: The question about a GPU repair course suggests a structured program teaching repair techniques. Such courses cover troubleshooting methods, hardware interventions, and maintenance tips for graphics cards.
Q: Nvidia graphics card repair service
A: The Nvidia graphics card repair service means reaching out to Nvidia or their authorized service centers for repairs. They handle warranty claims and offer specialized assistance for Nvidia products.
Q: How to fix a graphics card that has no display
A: The approach to fixing a graphics card with no display involves checking cables, the power supply, the motherboard slot, and monitor connections, alongside reinstalling drivers to restore functionality.
Q: How to fix graphics card on laptop
A: The method to fix a graphics card on a laptop often includes updating drivers, inspecting internal connections, and cleaning cooling components, though serious issues may require professional servicing.
Q: How to know if a GPU is fried?
A: The way to know if a GPU is fried involves checking for no signal output, continuous visual artifacts, or failure to boot. Testing the GPU in another system can help confirm if it’s irreparably damaged.
Q: What are signs of a damaged GPU?
A: The signs of a damaged GPU include visual glitches, performance drops, overheating, and unexpected crashes. Running diagnostic tests and checking for physical damage are key indicators of GPU failure.
Q: Can I send my GPU to Nvidia for repair?
A: The option to send your GPU to Nvidia for repair is available if your product is under warranty. Contact Nvidia support or an authorized service center for guidance on warranty repairs.
Q: Does Microcenter repair GPUs?
A: The inquiry about Microcenter repairing GPUs indicates that while some Microcenter locations offer basic repair services, specialized GPU repairs are generally handled by dedicated electronics repair shops or manufacturer-authorized centers.